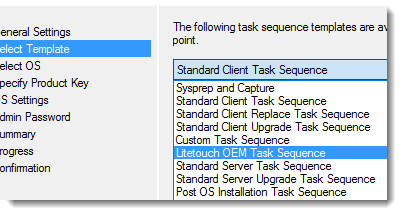
The MDT 2013u2’s “Litetouch OEM Task Sequence” does not partition UEFI drives using GPT

By | August 26, 2016
Share

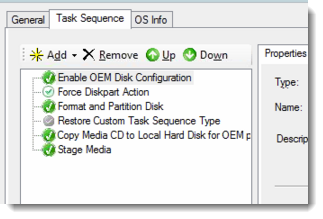
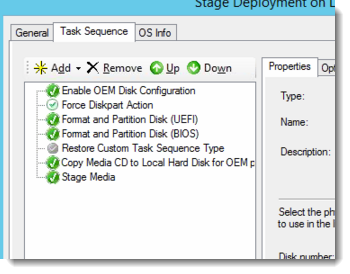
After the Litetouch OEM TS runs and the content is staged, on next boot up, no UEFI supported drives are found. To fix this, you must correct the litetouch oem task sequence.

Before:

After:

Copy the corrected “Format and Partition..” steps from your deployment TS.

Thanks goes to: https://social.technet.microsoft.com/Forums/en-US/db958f0d-b64c-4557-be79-cace90613493/litetouch-oem-task-sequence-uefi-support?forum=win10itprosetup

-BG

SOLVED: Netmotion XG Mobility Client Install Driver Prompt

By | August 11, 2016
Share

SOLVED (08/11/2016):
http://www.netmotionwireless.com/support/docs/MobilityXG/1100/help/mobilityhelp.htm#page/Mobility%20Server/setup.03.39.html

The “NM_Options” property MUST be used, even when using the MmsAddress MSI property.

So my final install string was this:

## <Perform Installation tasks here>
Show-InstallationProgress -StatusMessage 'Installing NetMotion XG Client. This may take some time. Please wait...'
Execute-Process -Path "msiexec.exe" -Parameters " /norestart /quiet /package ""$dirFiles\Mobility_xg_client_11.01_Win7_x64_release.msi"" NM_ADDRESS_VALUE=x.x.x.x:x EQSI=""1"" NM_Options=""$dirFiles\options.inf"" REBOOT=ReallySuppress"

Forum link: https://social.technet.microsoft.com/Forums/en-US/57812e8d-9ad2-4376-99d0-25f84beda57d/netmotion-xg-client-installation-hanging-at-driver-install-prompt?forum=mdt

My install command line (using PSAppDeployToolkit):

## <Perform Installation tasks here>
Show-InstallationProgress -StatusMessage 'Installing NetMotion XG Client. This may take some time. Please wait...'
Execute-Process -Path "msiexec.exe" -Parameters "/qn /i ""$dirFiles\Mobility_xg_client_11.01_Win7_x64_release.msi"" NM_ADDRESS_VALUE=x.x.x.x:x EQSI=""1"" REBOOT=""ReallySuppress"""

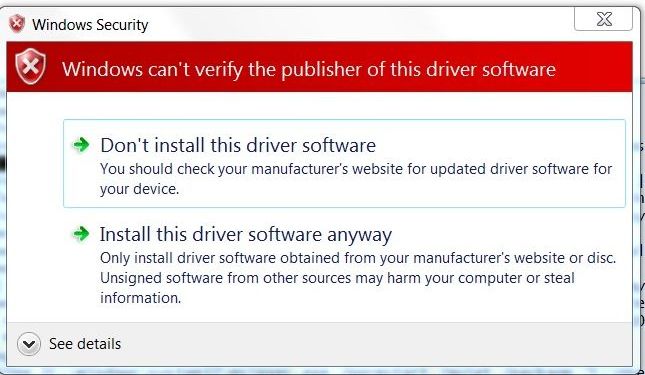
netmotion_prompt

in the internet options, it appears as though the MSI is adding themselves as a “Trusted Publisher”, but the prompt is still appearing.

netmotion_trusted_pub


/BG

Export and Import LGPOs and MLGPOs for Windows 10 in MDT 2013 Update 2 or SCCM

By | August 10, 2016
Share

Scenario: Customer needed to lock down a specific user account in Windows 10, without effecting the local Administrator account. Unit was not going to be joining a Domain. LGPO was the only available free alternative.

The new LGPO tool (https://blogs.technet.microsoft.com/secguide/2016/01/21/lgpo-exe-local-group-policy-object-utility-v1-0/) does NOT support MLGPOs (Multiple Local Group Policy Objects).

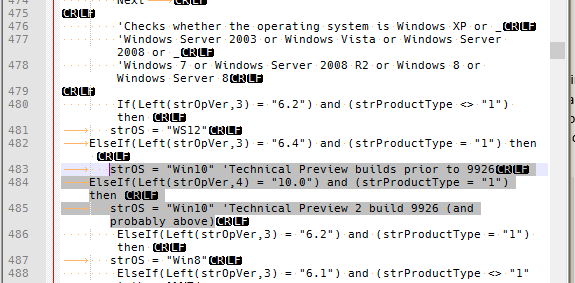
The old LocalGPO.wsf script (https://gallery.technet.microsoft.com/LocalGPOmsi-Excellent-MS-2593b2eb) does, but it doesn’t “technically” support Windows 10. So you must first edit this script to force it to support Windows 10. Here are my edits (but you don’t have to edit it yourself, the download link is listed below):


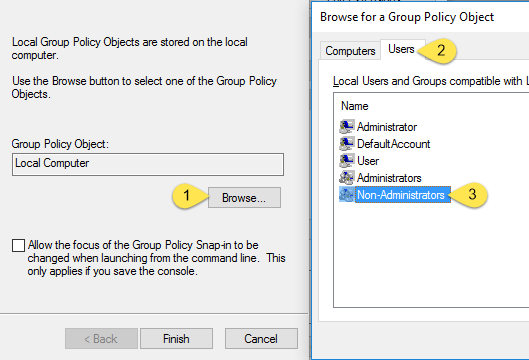
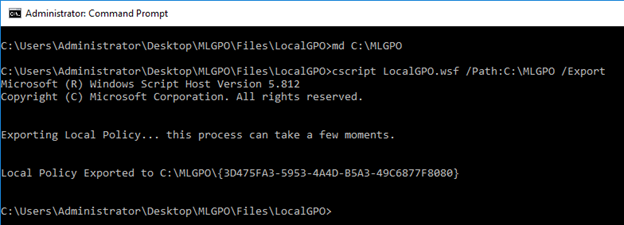
So next I used LocalGPO.wsf script to export my desired LGPO, which included settings I specified for the “Non-Administrators” group.

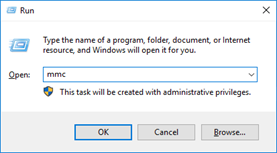
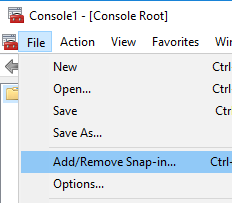
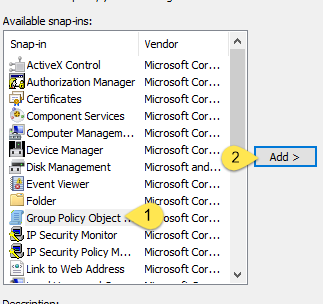
Here are the steps I took to set up the MLGPO:

Command: cscript LocalGPO.wsf /Path:C:\MLGPO /Export

Download my MLGPO app package and adjust it to deploy your captured MLGPO folder (should have been exported to C:\MLGPO\{GUID}): https://drive.google.com/open?id=0BwHI1r8k8A75MU1lbjBfX2NxeEE
* package was wrapped using http://psappdeploytoolkit.com/ and tested on SCCM 2012 and MDT 2013 Update 2.

/BG

My edits for PSAppDeployToolkit’s Wrapper PS1

By | August 10, 2016
Share

AppDeployToolkitBanner2

http://psappdeploytoolkit.com/ ‘s wrapper is my new favorite wrapper for applications I add to MDT or SCCM.  As Johan & others have stated, the main reason to use wrappers is how mush it eases testing of creating packages.  Here are my 2 edits I make to all of my Deploy_Application.ps1 scripts.

1.Tell PSAppDeploy to copy the content (files\) to my local %temp% before installation. This is especially important when installing NetMotion or similar installs that drop the network during installation.

##*===============================================
##* PRE-INSTALLATION
##*===============================================

# ......

## Copy $dirFiles local before running
[string]$Destination = "$envTemp" + [System.IO.Path]::GetRandomFileName()
Try {
	Show-InstallationProgress -StatusMessage "Copying files locally. Please wait…"
	Copy-File -Path "$dirFiles" -Destination "$Destination" -Recurse
	Execute-Process -Path "icacls.exe" -Parameters """$Destination"" /grant ""Everyone:(OI)(CI)(F)"" /t"
	[string]$dirFiles = $Destination
}
Catch {
	$InstallPromptErrMsg = "There was an error in copying the install files local. `n$(Resolve-Error)"
	Write-Log -Message $InstallPromptErrMsg -Severity 3 -Source $appDeployToolkitName
	Show-DialogBox -Text $InstallPromptErrMsg -Icon "Stop"
	Exit
}

i.e. using localized $dirFiles:

Execute-Process -Path "cscript.exe" -Parameters """$dirFiles\LocalGPO\LocalGPO.wsf"" /Path:""$dirFiles\{AAF84CEF-E7E2-4394-9732-EE74A8FDE474}""" -WorkingDirectory "$dirFiles\LocalGPO"

2.Clean-up the temp location.

##*===============================================
##* POST-INSTALLATION
##*===============================================
[string]$installPhase = 'Post-Installation'

## <Perform Post-Installation tasks here>
# Delete local copy of $dirFiles
Show-InstallationProgress -StatusMessage "Performing clean up routine. This may take some time. Please wait..."
Remove-File -Path "$dirFiles" -Recurse

/BG
MDT does not like WIMs with 2 indexes!

By | July 27, 2016
Share

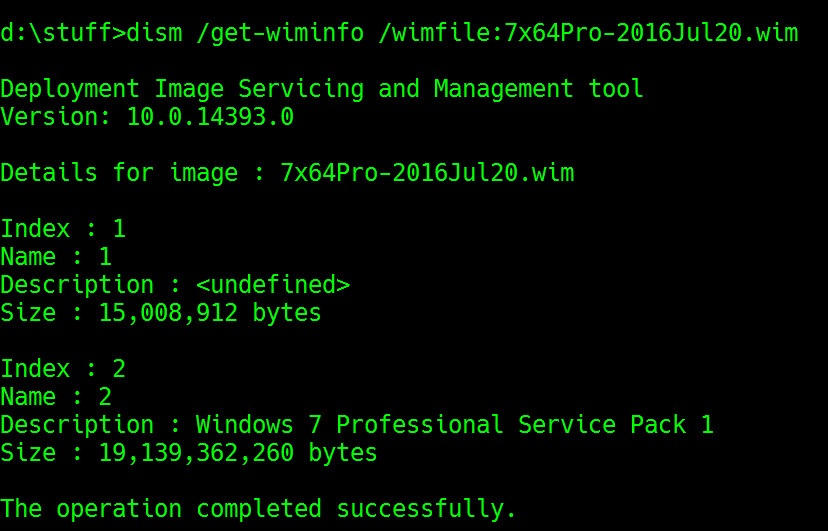
I like to capture my thick/hybrid WIM files with SCCM capture ISOs.  The big problem with this is that MDT doesn’t like WIM files with multiple indexes.  The symptom is that MDT appears to import the WIM, but NO OSes are added to the Deployment Workbench.  To fix this you must delete the 1st index from the WIM before performing the import into MDT.

WIM with 2 indexes:

2 Indexes in Captured WIM


Command to delete the 1st index:

dism /delete-image /imagefile:7x64Pro-2016Jul20.wim /index:1

Delete Index 1 DISM command

/BG