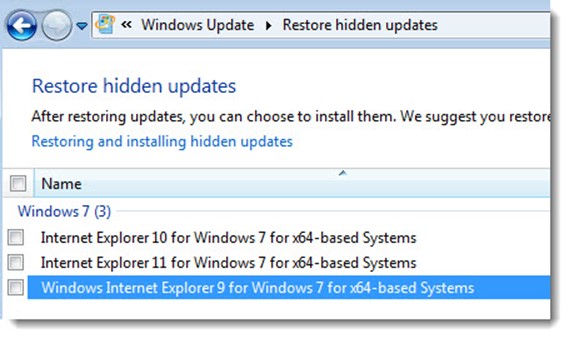
Want to exclude Internet Explorer 9, 10, and 11 from your Windows 7 image? Hide all of the updates listed in the image below:
/BG
wpeditor domain was triggered too early. This is usually an indicator for some code in the plugin or theme running too early. Translations should be loaded at the init action or later. Please see Debugging in WordPress for more information. (This message was added in version 6.7.0.) in /home1/briangon/public_html/wp-includes/functions.php on line 6114
Panasonic bundles by default, include all Mandatory and Recommended installations. They also include optional installations, which take up disk space, even when compressed. This tutorial will display how to change a packaged Bundle and re-package it back up for distribution.
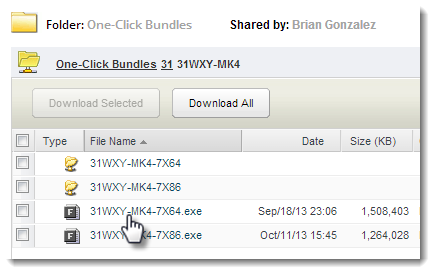
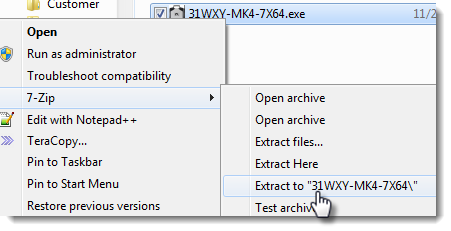
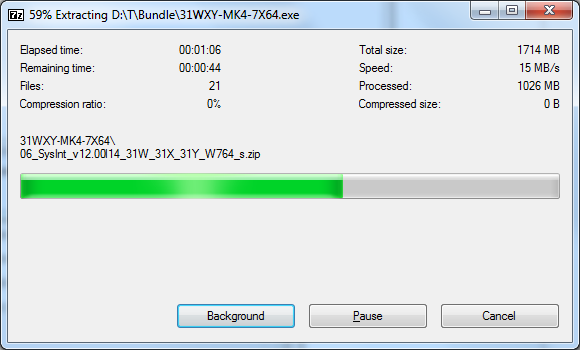
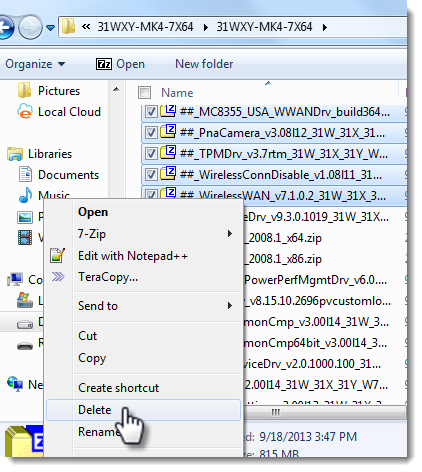
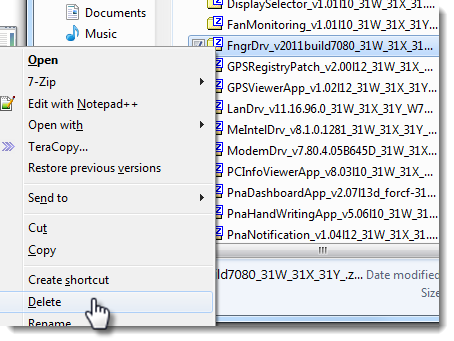

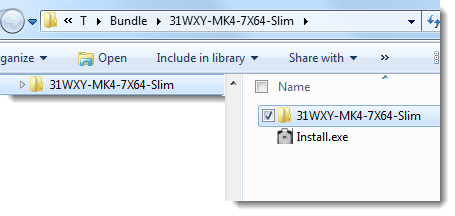
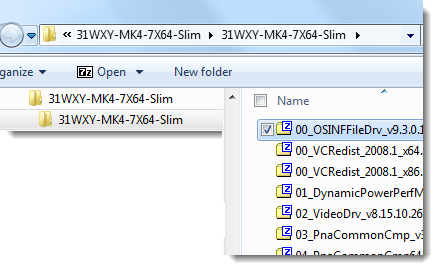
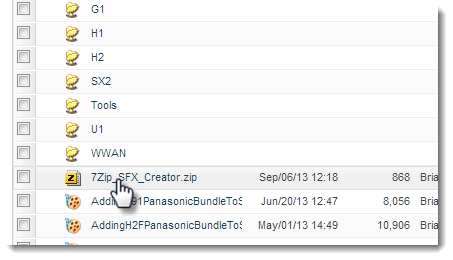
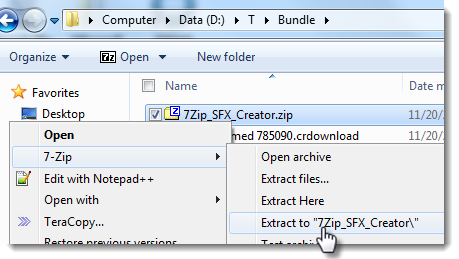
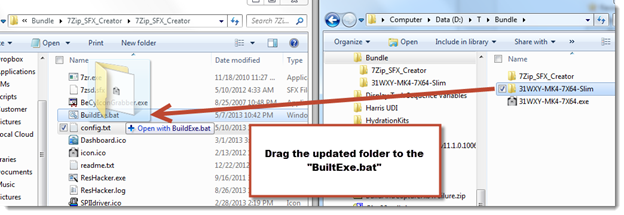
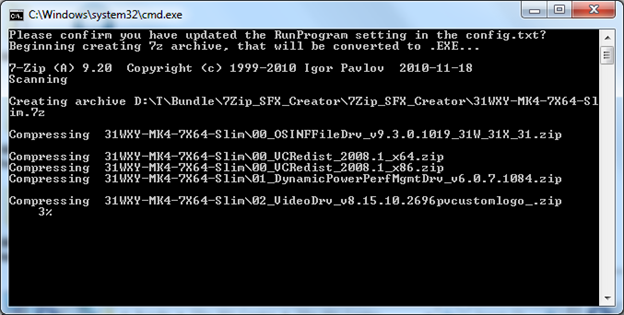
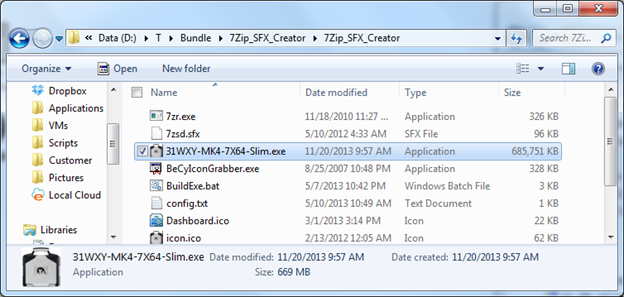
*If further support is required, please contact imaging@us.panasonic.com
The consumer grade ACM (AT&T Communications Manager), simply doesn’t cut it for Corporations. The installation is bloated with WLAN control, numerous useless menu items, no simple method for hard-setting your APN (Access Point Name). These settings are vital when rolling out a hundred or so machines.
I came across a great resource for building silent installations, which allow you to cut the consumer fat from the software along with hard code Corporate APN settings and more.
The “AGN Client Mobility Installer”. Why this is a secret resource kept from the public, is unknown. It works flawlessly!
Download the latest release from this site: ftp://ftp.attglobal.net/pub/client/win32/mobility/
When opened you will be presented with a screen, which allows you to configure a plethora of options.
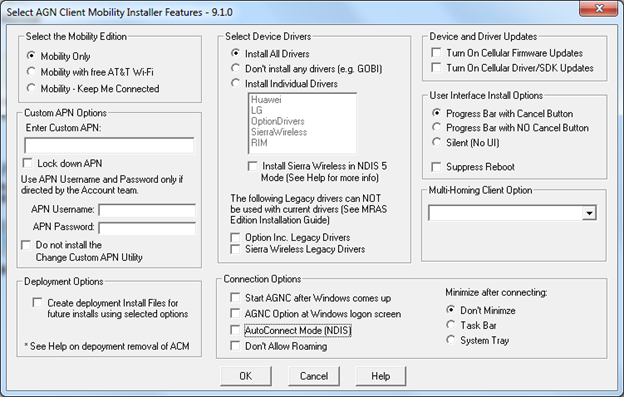
Tick the “Create deployment Install Files..” and then this software will build an .MSI and .MST for that can be utilized for silent installations.
Note: Make sure to tick the “Suppress Reboot” as it will trigger a reboot post-install.
Here were my desired settings.
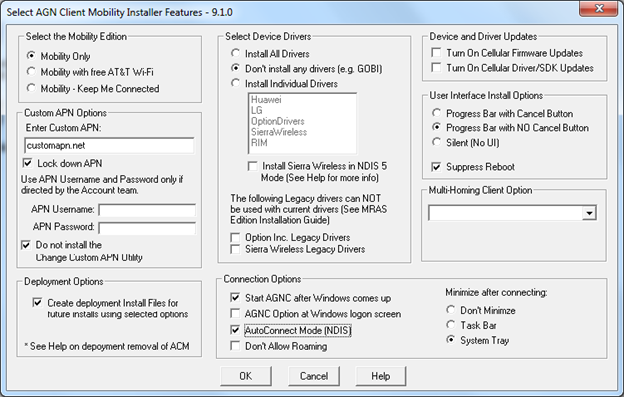
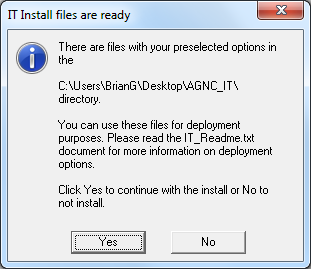
Click “No” after the install files are built and grab the .EXE and Mobility.ini files from the built “SingleExecutable” directory. If you wish to use an .MSI and .MST you will also need to grab the latest “agnc_laptopconnect.msi” file from this website:
http://www.corp.att.com/agnc/windows/
or
ftp://ftp.attglobal.net/pub/client/win32/
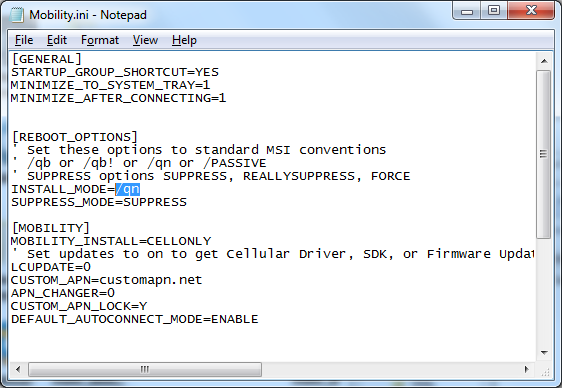
One last tip, when using the “SingleExecutable”, open the “Mobility.ini” and change the “Install_Mode” to “/qn”, in my testing with MDT/SCCM, this worked best.
When attempting to capture an XP image using MDT2012U1 from a VMWare Workstation machine, I ran into an issue because WinPE could not see the Hard Drive when attempting the .WIM capture. After some searching, I found that adding the following setting to my Virtual Machine’s .VMX configuration file fixed the issue.
.encoding = "windows-1252"
config.version = "8"
virtualHW.version = "9"
scsi0.present = "TRUE"
scsi0.virtualDev = "lsisas1068"
memsize = "4096"
scsi0:0.present = "TRUE"
scsi0:0.fileName = "BuildAndCapture-001-000003.vmdk"
Another useful setting is to force the VMWare machine to emulate an Intel E1000 adapter.
scsi0.pciSlotNumber = "160"
ethernet0.generatedAddress = "00:0C:29:41:1A:54"
ethernet0.pciSlotNumber = "33"
ethernet0.generatedAddressOffset = "0"
ethernet0.virtualDev = "e1000"
/Brian G
In a Computer Refresh scenario on an un-encrypted machine, the old Computer Name is stored in plain text in the registry on the local disk. MDT can pull in this information and toss it into the OSDComputerName variable to hasten your Deployment Wizard.
1. Update your CustomSettings.INI (Rules) to call an external script to populate the OSDComputerName variable.
[Settings]
Priority=Default
Properties=MyCustomProperty

[Default]
OSInstall=Y
SkipCapture=NO
SkipAdminPassword=YES
SkipProductKey=YES
SkipComputerBackup=NO
SkipBitLocker=NO
UserExit=ZTIGrabOldCompName.vbs
OSDComputerName=#fGrabOldCompName("MDT")#
2. Add the ZTIGrabOldCompName.vbs script to your <DeploymentShare>\Scripts directory.
https://github.com/brianfgonzalez/Scripts/blob/master/ZTIGrabOldCompName.vbs
' // ***************************************************************************
' //
' // Copyright (c) Microsoft Corporation.  All rights reserved.
' //
' // Microsoft Deployment Toolkit Solution Accelerator
' //
' // File:      ZTIGrabOldCompName.vbs
' //
' // Purpose:   Grabs old CompName if avail. and returns to CS.INI.
' //
' // ***************************************************************************
Function UserExit(sType, sWhen, sDetail, bSkip)
	UserExit=Success
End Function

Function fGrabOldCompName(sDefaultName)
	Dim sOldCompName, sLocalSWHiveFilePath
	oLogging.CreateEntry "UserExit:Pulling computername from local registry.", LogTypeInfo

	If oFSO.FileExists("C:\WINDOWS\system32\config\system") Then
		sLocalSWHiveFilePath = "C:\WINDOWS\system32\config\system"
	ElseIf oFSO.FileExists("D:\WINDOWS\system32\config\system") Then
		sLocalSWHiveFilePath = "D:\WINDOWS\system32\config\system"
	ElseIf oFSO.FileExists("E:\WINDOWS\system32\config\system") Then
		sLocalSWHiveFilePath = "E:\WINDOWS\system32\config\system"
	Else
		sLocalSWHiveFilePath = "FALSE"
	End If
	oLogging.CreateEntry "UserExit:Local system hive location set to: " & sLocalSWHiveFilePath, LogTypeInfo

	If sLocalSWHiveFilePath <> "FALSE" Then
		oShell.Run "reg load HKLM\sysimport " & sLocalSWHiveFilePath, 1, True
		sOldCompName = oShell.RegRead("HKLM\sysimport\ControlSet001\Control\ComputerName\ComputerName\ComputerName")
		oShell.Run "reg unload HKLM\sysimport", 1, True
		fGrabOldCompName = sOldCompName
		oLogging.CreateEntry "UserExit:Setting OSDComputerName variable to: " & sOldCompName, LogTypeInfo
	Else
		fGrabOldCompName = sDefaultName
		oLogging.CreateEntry "UserExit:Error locating old computername.  Setting computername to default value: " & sDefaultName, LogTypeError
	End If
End Function
3. Lastly, test a refresh machine deployment. The script will log to the BDD.log.
FYI: This script was tested on MDT2013 and MDT2012U1.
/Brian G